


iFunia DVD Creator User Guide




Learn how to create professional DVD discs, ISO files, and DVD folders using iFunia DVD Creator. This guide covers video importing, editing, menu customization, previewing, and burning settings for both Mac and Windows users.
Download & Install
For Mac Version
1. You can download the installation package of iFunia DVD Creator for Mac from the below link.
 Free Download macOS 10.15 or later
2. Install iFunia DVD Creator with the downloaded package.
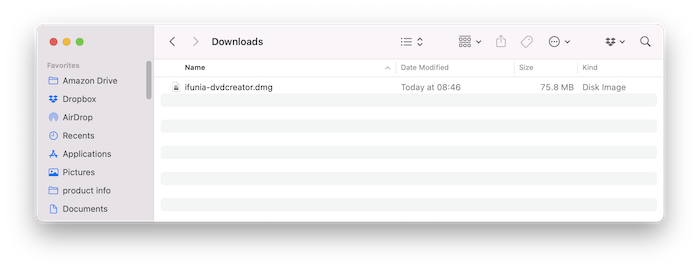
Double-click the .dmg file.
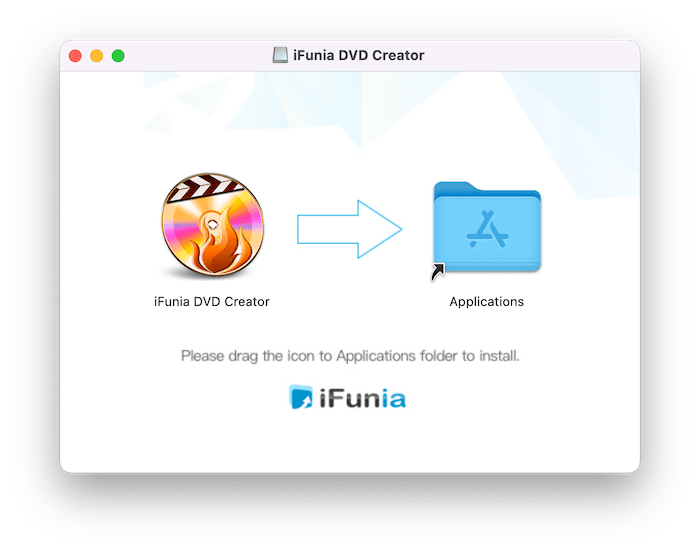
Drag the iFunia DVD Creator icon to Applications folder.
For Windows Version
1. You can download the installation package of iFunia DVD Creator for Windows from the below link.

2. Install iFunia DVD Creator with the downloaded package.
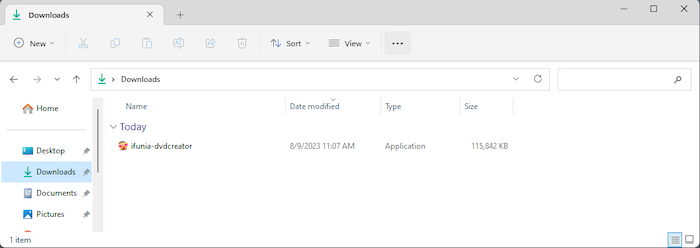
Double-click the .exe file to run it.
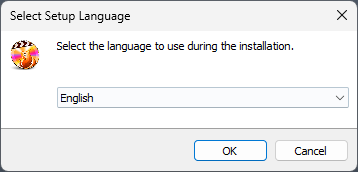
Select a preferred language, the default language is English. iFunia DVD Creator supports English, German, French, Italian, Spanish, Portuguese and Japanese.
Select a folder to install the program (It is recommended to save it under D: drive instead of C: Drive)
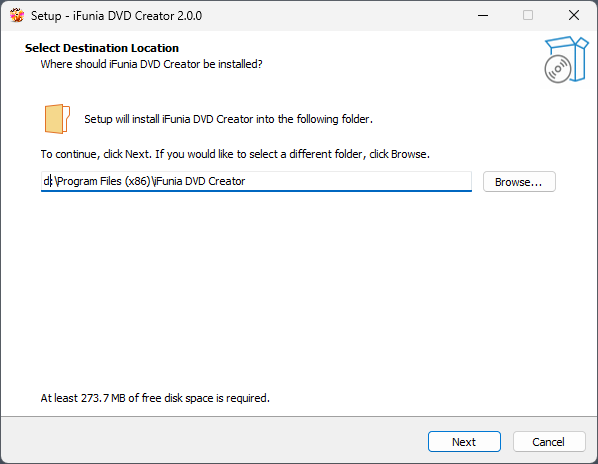
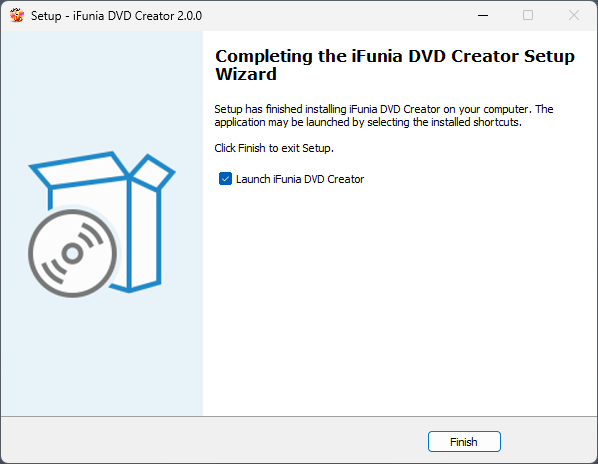
Click Next > Next > Install to continue the installation process, when the below window appears, it means that the program has been installed successfully.
Activation
After installing the program, you need to activate the program if you want to use the full version features.
1. Double click iFunia DVD Creator to run the program, and then click the key icon at the right upper corner.
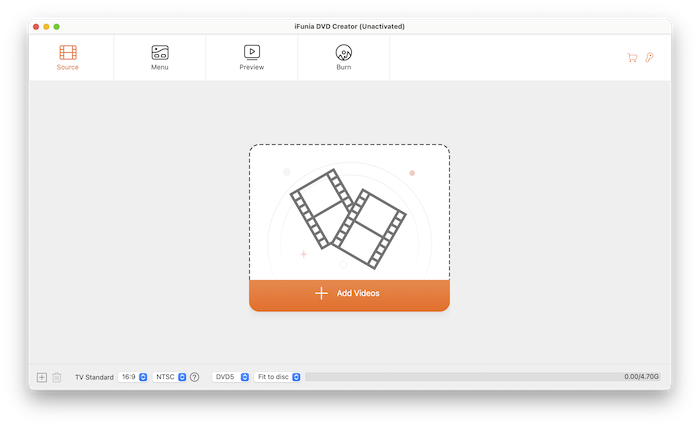
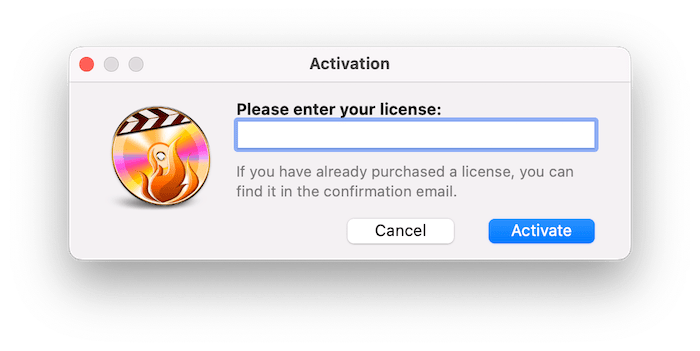
2. Copy-n-paste the license code into the popped-up window, click "Activate".
Add Videos to Project
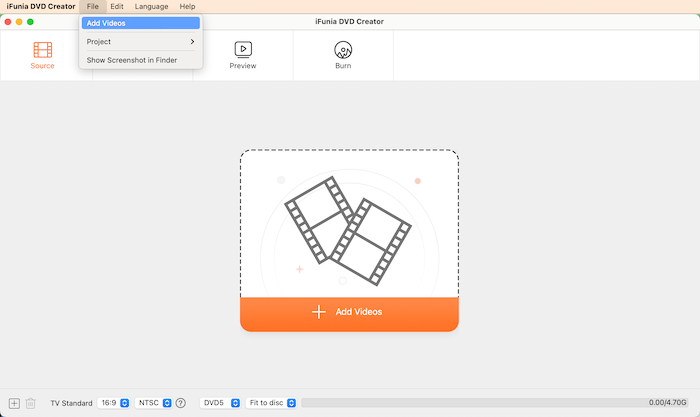
iFunia DVD Creator supports 200+ video formats input, there are 3 ways to add video files:
1. Click  , and then select the target video files on the pop-up window.
2. Drag-n-drop the target video files into the main interface of the program.
3. Click File > Add File(s)… on the menu bar, select the target video files on the pop-up window.
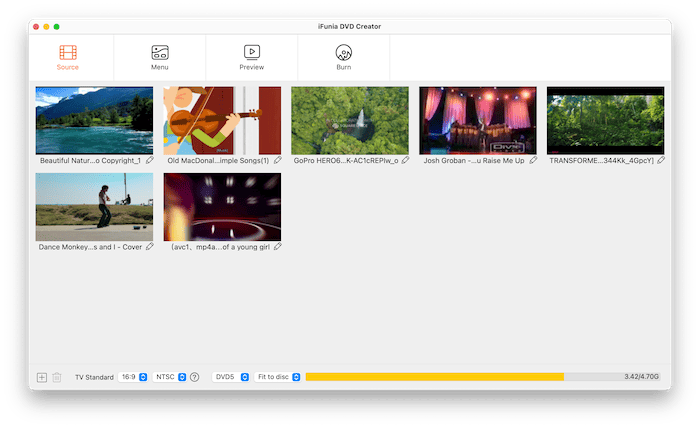
You can rearrange video order by dragging thumbnails.
To delete the added videos, you can select the target files, press "delete" on your keyboard or click  at the lower left corner of the interface, if you want to delete all videos at a time, press "command+A" to highlight all the videos to delete.
Choose DVD Type & Output Settings
configure your disc settings:
DVD Types
- DVD-6(4.7GB)
- DVD-9 (8.5GB)
- DVD-10(9.4GB)
TV Standard
- NTSC (North America, Japan)
- PAL (Europe, Asia)
Aspect Ratio
- 16:9 widescreen
- 4:3 standard
Quality Options
- Fit to Disc (recommended)
- High / Standard quality modes
Edit Videos Before Burning
iFunia DVD Creator includes a built-in video editor. Find the video you need to edit, click  under the thumbnail, and then it will bring you to the video edit window.

a. Trim video clips
1. You can click  or
or  to play/pause the video, and move
  and
and  of the playback progress bar to choose a specific part of the video.
2. You can also manually enter the Start Time and End Time to confirm the clip to be trimmed.
3. To reset the start and end time back to the original, just click 
b. Crop frame size
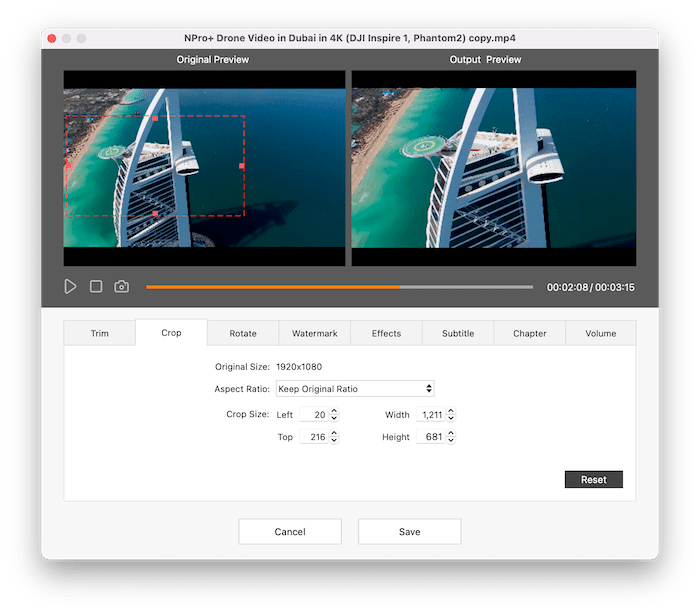
1. Navigate to Crop tab, you can manually adjust the cropping area by dragging the central and surrounding handles.
2. You can also adjust the size and position of cropping area by changing the figures in those four boxes.
3. You can select an output aspect ratio for cropping with four options: Keep Original Ratio, 16:9, 4:3 and Any.
4. To reset the video back to the original, just click
c. Rotate or flip video
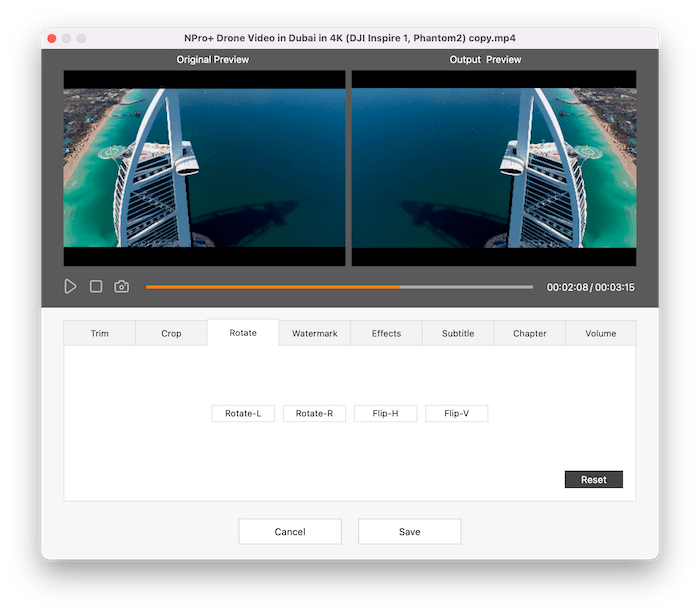
1. Navigate to Rotate tab, each of the four buttons specifically represents one specific way to rotate or flip the video, click the button as your requirement.
2. To reset the video back to the original, just click
d. Add text or image watermark
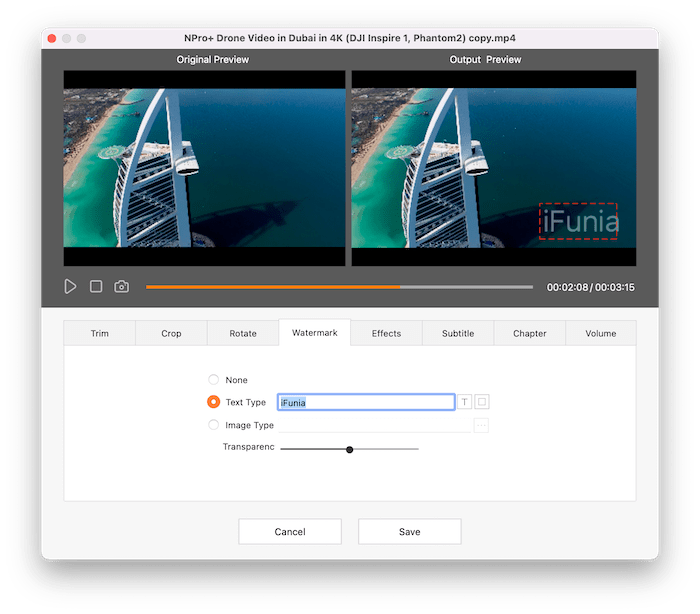
1. Navigate to Watermark tab, you are allowed to add any text watermark or image watermark to the video.
2. Text watermark: select the "Text type", type the content in the box, pick its font and color by clicking  and
and  , and set its position and degree of transparency.
3. Image watermark: select the "Image type", click  to choose the image to be used as a watermark, and set its position and degree of transparency.
e. Adjust brightness, contrast, saturation
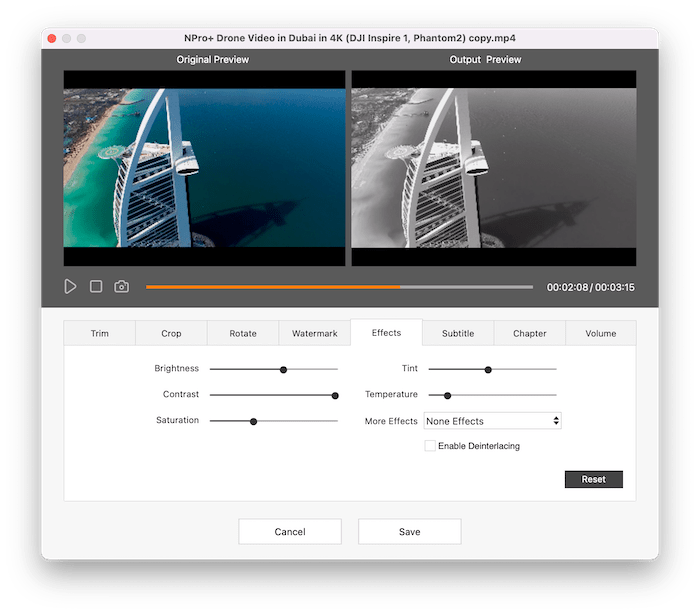
1. Navigate to Effects tab, set the degrees of Brightness, Contrast, Saturation, Tint, Temperature by resetting their respective control sliders.
2. Choose a special effect for the output video from the list in "More Effects" option box.
3. In this section, you also can find the deinterlacement feature, which can turn interlaced videos into a non-interlaced form, enhancing spectators viewing experience rather appreciably. And it is also quite easy to use. Just need to check the box of "Enable Deinterlacing".
4. To cancel all the effects and reset the video back to the original, just click
f. Add subtitles (.srt, .ass, .ssa)
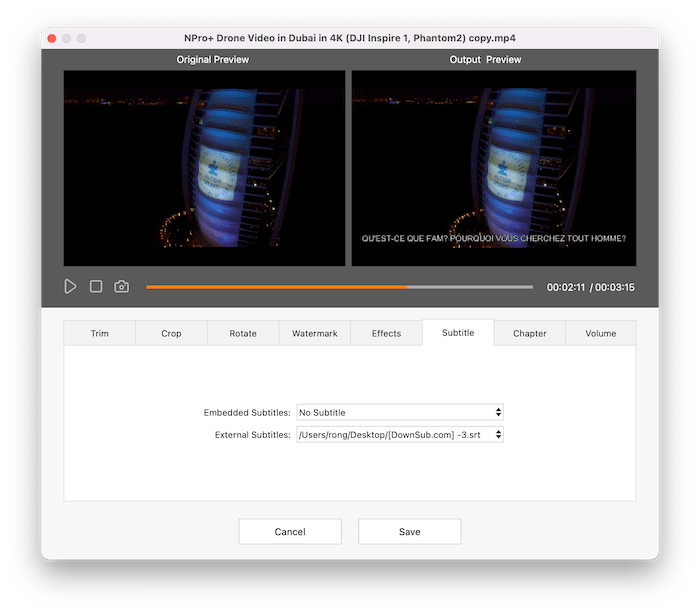
Navigate to Subtitle tab, and then you are able to select embedded subtitles the video includes or import an external subtitle files from your local drive.
Note: iFunia DVD creator supports .srt, .ass and .ssa subtitle file.
g. Create chapters
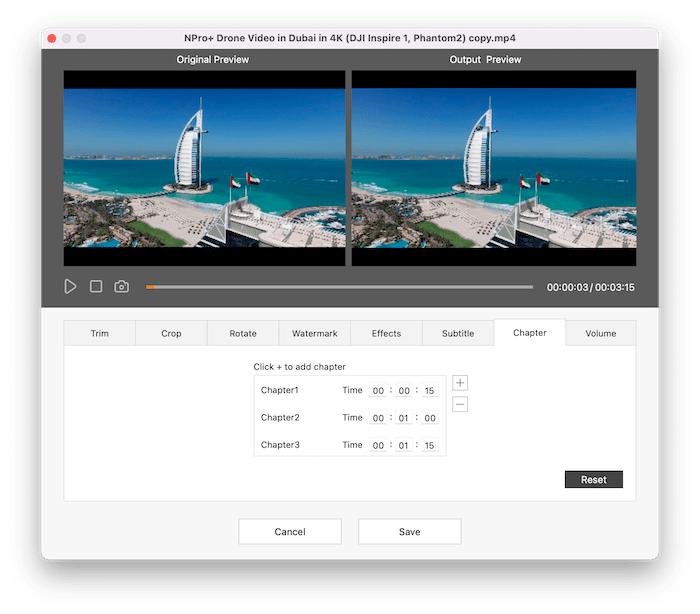
Navigate to Chapter tab, click  , fill in the end time, press "Enter" on your keyboard to confirm your filling, then Chapter1 is finished. You can also keep clicking to add chapter2 or more chapters in the same manner.
Tips: iFunia DVD Creator can not only create chapters, but also recognize the chapters that you created in a video editor program.
h. Adjust volume and fade in/out
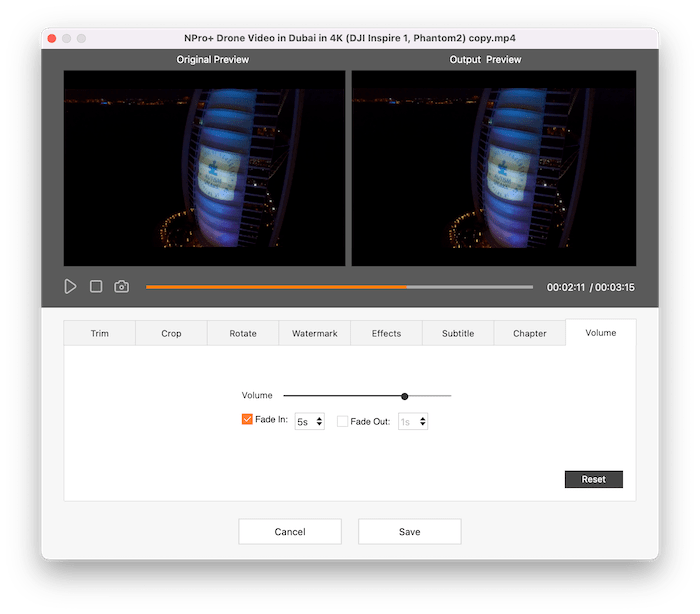
1. In some cases, the voice of the original video is too loud or too low, if you want to adjust it, you can navigate to Volume tab, slide the volume bar as you like.
2. In addition, if you want to add “Fade In” effect at the beginning of the video or add “Fade Out” effect at the end of your video, tick the option “Fade In” or “Fade Out” and then select the duration.
Create Custom DVD Menus
Navigate to Menu tab on the top, there are 3 DVD modes and you can choose the one you prefer.
DVD with menu + chapters
Click  to display the menu tree, tick the checkbox of the title that has chapters, and then all the chapter pages displays.
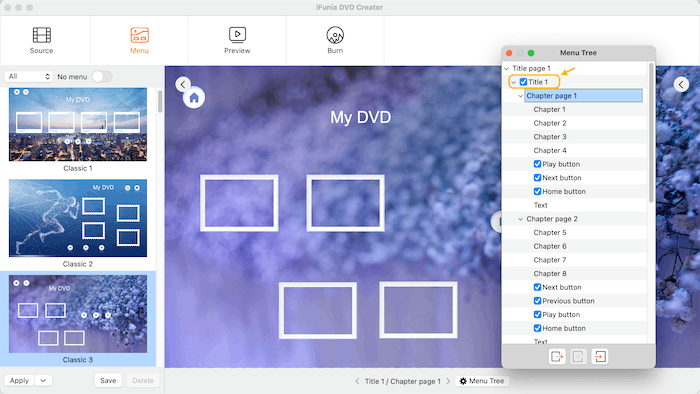
DVD with only title menu
This is the most common mode, it will display all the title pages and you can customize the title pages as you like.
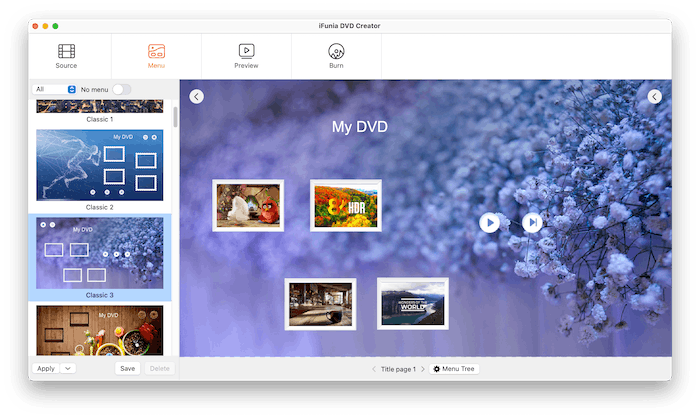
DVD with no menu (auto-play)
If you don't want to have a menu, just want to auto play the videos, this option suits for you. Just slide on  and go on the next burning step.
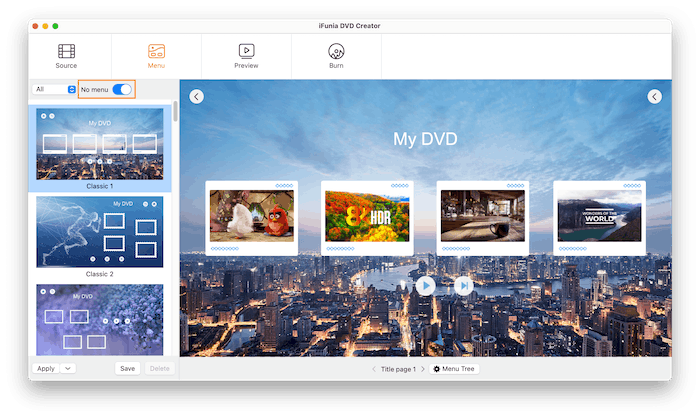
You can directly use built-in templates (Classic, Holiday, Travel, etc.) Or create fully custom DVD menus.
Use Built-in Templates
Preview templates on the left panel and double click to choose one you like.
The template is applied only to the selected menu. Click  to apply it to all title and chapter menus.
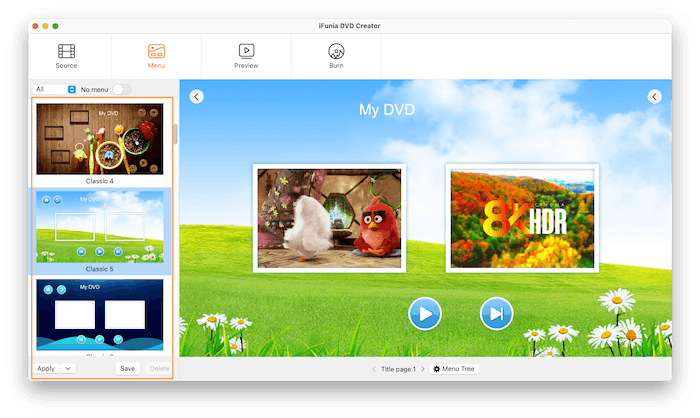
Customize Elements
Click  to show the element customization tools.
1. Background image or color
Navigate to the Background tab. All available background images will be displayed in a list. Double-click any image to replace the current background.
If you prefer a simple background, tick  and choose your preferred color to set a solid background.
You can also tick  , select an image from your local drive, and use it as the background.
Click  and choose to apply the background to all menus, the current menu, all title menus, or all chapter menus.
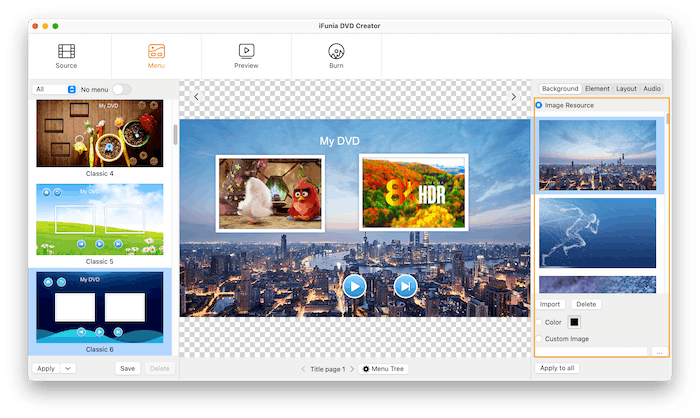
2. Title, text and button styles
Multiple elements can appear in a menu, including text boxes, titles, and buttons. You can edit these elements under the Element tab.
For Titles
Highlight the target title on the menu page in the center of the window. The editing tools will appear on the right panel. First choose a style, then customize the corresponding settings, such as title name, title name's position, frame, or thumbnail, according to the selected style.
If you want to change the title thumbnail, click  to preview the highlighted title. When the video displays the frame you want to use, click
  to set it as the thumbnail.
If you want to move titles to previous or next page, click the corresponding buttons  on the menu tree.
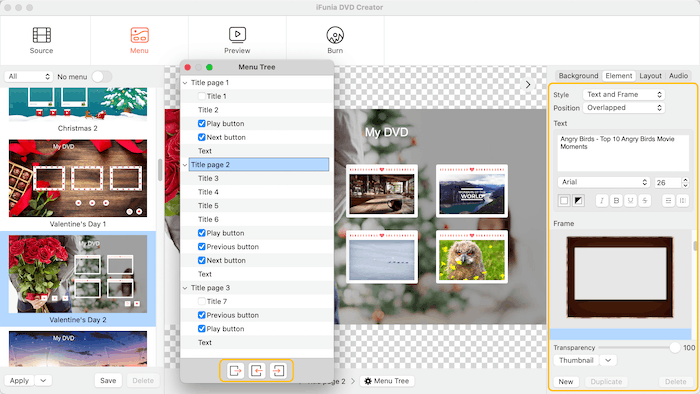
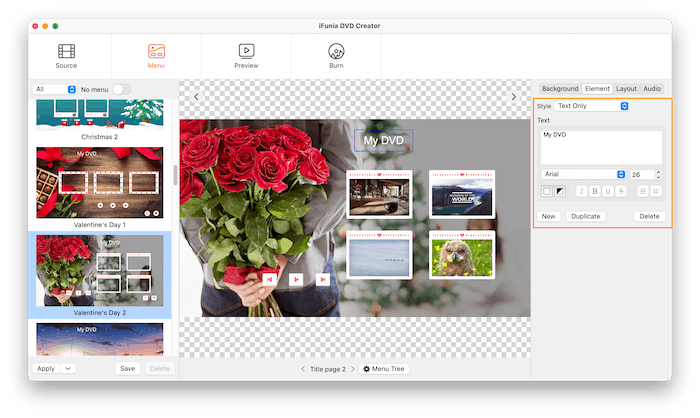
For Texts
Highlight “Text” under one of the titles. You can then choose a text style and adjust settings on the right panel, such as text content, font, color, and size.
You can also click  to insert a new text box, or duplicate the selected text box by clicking
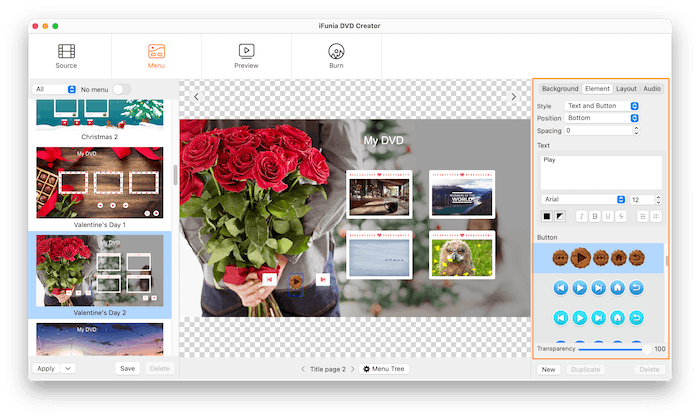
For buttons
Highlight the button on the menu page, choose a button style, you can customize button's texts, button types and transparency.
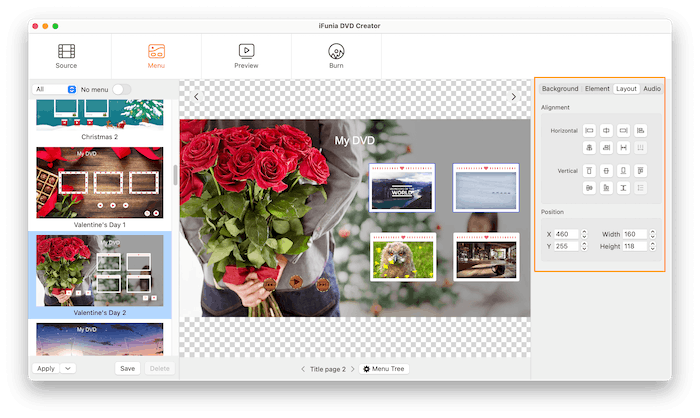
3. Titles, texts and buttons Layouts
You can move their positions by dragging and dropping or highlight the target elements and choose a proper alignment on the right side.
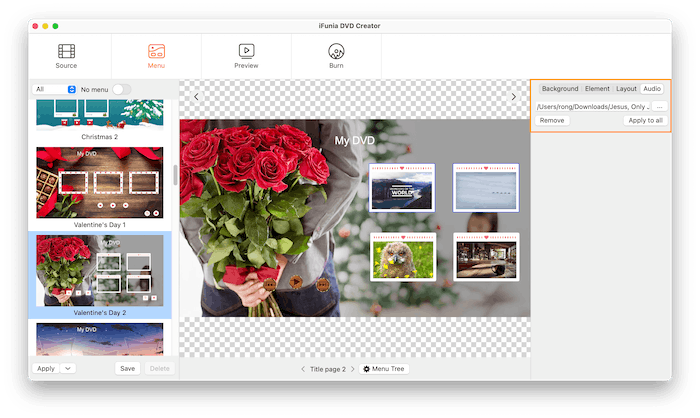
4. Background music
Navigate to tab Audio , you are allowed to upload music files as the background music from your local drive. Just click  and choose the target audio files to upload. After uploading the audio, click if you want to use this music for all title and chapter menus.
Preview Your DVD
Once you have finished editing the menu, you may want to preview the entire DVD to see how it will appear on a TV or computer.
To do this, navigate to the Preview tab. The preview will start automatically, and you can control the playback using the playback bar below.
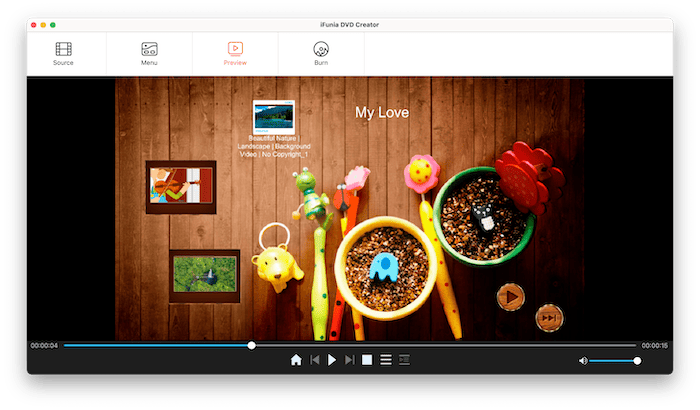
 Click it to back to the Home page.
 /
/  Click it to play or pause the title.
 Click to play the video before this one.
 Click to play the video after this one.
 Click to stop playing the title and back to the Home page.
 Click to view all the titles in a list and help you to easily navigate the title and view it.
 Click to view all the chapters in a list and help you to easily navigate the chapter and view it.
Burn DVD (Disc, ISO or DVD Folder)
After the project has been adjusted and previewed thoroughly and properly, you can begin to burn your own DVD. Navigate to Burn tab, you will be able to set the detailed parameter of your DVDs.
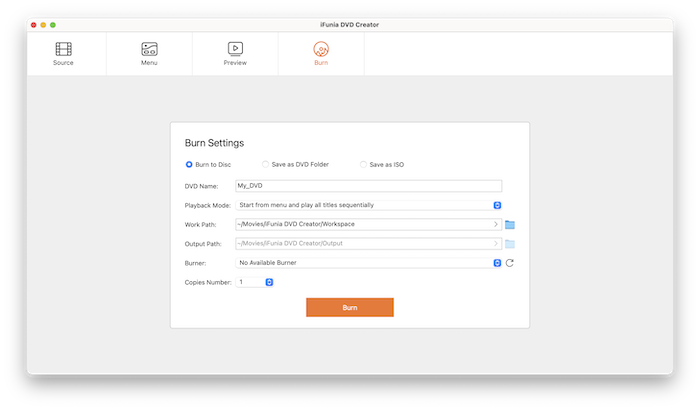
1. You can burn videos to DVD disc directly, also you can convert and backup files to DVD folder or ISO file firstly. Please notice that if you choose the DVD Disc, don't forget to insert a blank DVD Disc into computer's drive.
2. DVD Name: The maximum number of characters allowed is 32.
3. Playback Mode: It used to control the playback of menu and titles, there are 5 modes existing, please check all of them carefully and select the proper one you need before clicking Burn.
1) Start from menu and play all titles sequentially: when you insert the DVD, it will auto play the menu, and then play all your titles one by one, when the last title is finished, it will start from menu again.
2) Start from title and loop all ones: when you insert the DVD, it will auto play the first title and then loop all the titles one by one. If you want to display the menu, you will have to manually press Menu button.
3) Loop the menu, play the title when pick it and then back to menu: when you insert the DVD, it will play the menu in loop until you manually select a title to play, and it will back to menu again when the selected title ends.
4) Loop the menu and loop a title when pick it: when you insert the DVD, it will play the menu in loop until you manually select a title to play, and then it will play this title in loop until you manually select another title.
4. Work Path: It is used to save the files that were generated during the burning process, please make sure this path has enough free space.
5. Folder Path: It used to save the created DVD Folder or ISO files when you select to save as DVD folder or save as ISO.
6. Burner: All of the available driver will be displayed here, pick the correct one when you need to burn to disc.
7. Copies Number: iFunia DVD Creator allows you to burn up to 30 copies, you can choose the number of copies you want to burn.
Update iFunia DVD Creator
We always suggest users to use the latest version of the program.
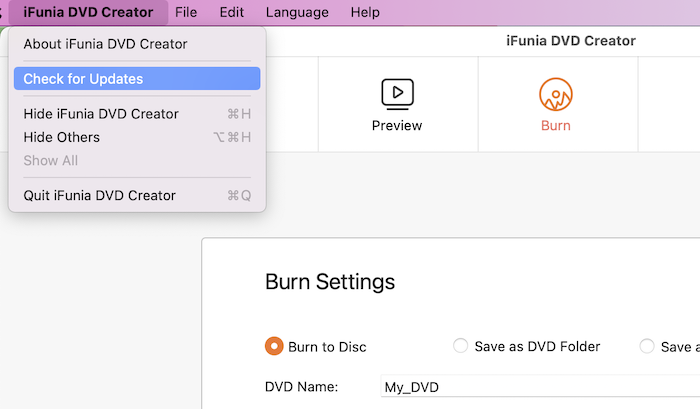
When you launch iFunia DVD Creator, iFunia will auto check for updates.
Also, you can click iFunia DVD Creator > Check for Updates… on the left top menu bar to manually update it.

Jessica Nielsen has worked in iFunia for 8 years, she is very familiar and professional with video parameters and iFunia’s programs, and can provide accurate and useful suggestions to iFunia users.
Comments (0)
Leave a Reply